How to Use Google Workspace Gmail with nodeBB [2021]
Google Workspace, formerly known as Google G Suite, is a versatile system that includes Gmail and other google applications. It can be used for personal or business reasons.
Setting up a mail server is fairly time consuming and requires a lot of work in order to ensure emails are deliverable.
Namely, there are measures you need to implement in order to make your mail server free of spam. In fact, if it’s not setup properly then your emails will likely end up in the spam folder.
Luckily, Google Workspace Gmail makes it easy to setup your own mail server so that emails come from @your_domain_name and not @gmail.com.
Specifically, if you set up what’s known as SMTP relay, you don’t have to worry about managing the mail server, everything’s done for you. Plus, nodeBB is compatible with this right out of the box so no tinkering is required.
Benefits of using SMTP Relay for nodeBB:
- Protects data – All emails sent are encrypted which helps protect sensitive data
- Reduces undelivered emails – Emails are much more likely to arrive in the recipients inbox rather than the spam folder
- Improves security – Gmail has a lot of spam filters and other filters that can detect and prevent malicious emails from ever being sent out or received
Table of Contents
Step 1) Setup SMTP Relay in Google Workspace
First, let’s open up the SMTP relay settings.
- Login to your Google Workspace administrator account.
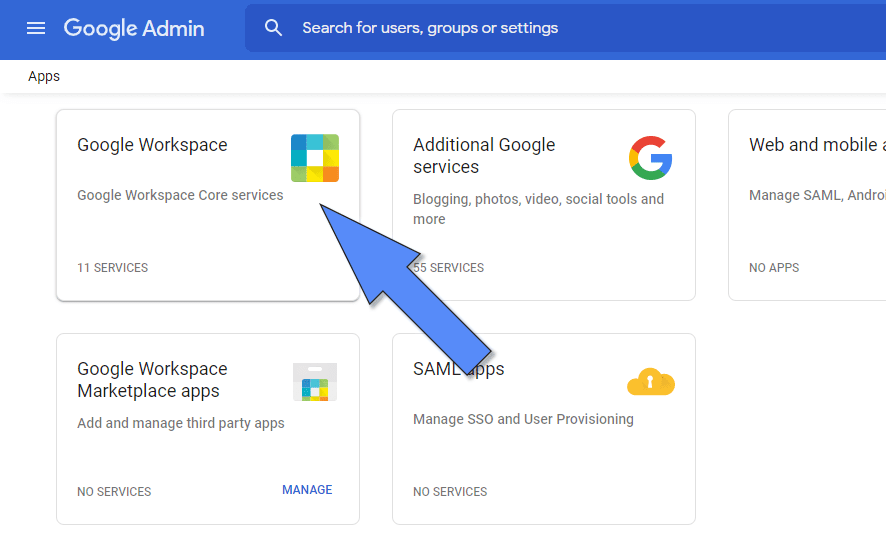
- Click Apps -> Google Workspace -> Gmail
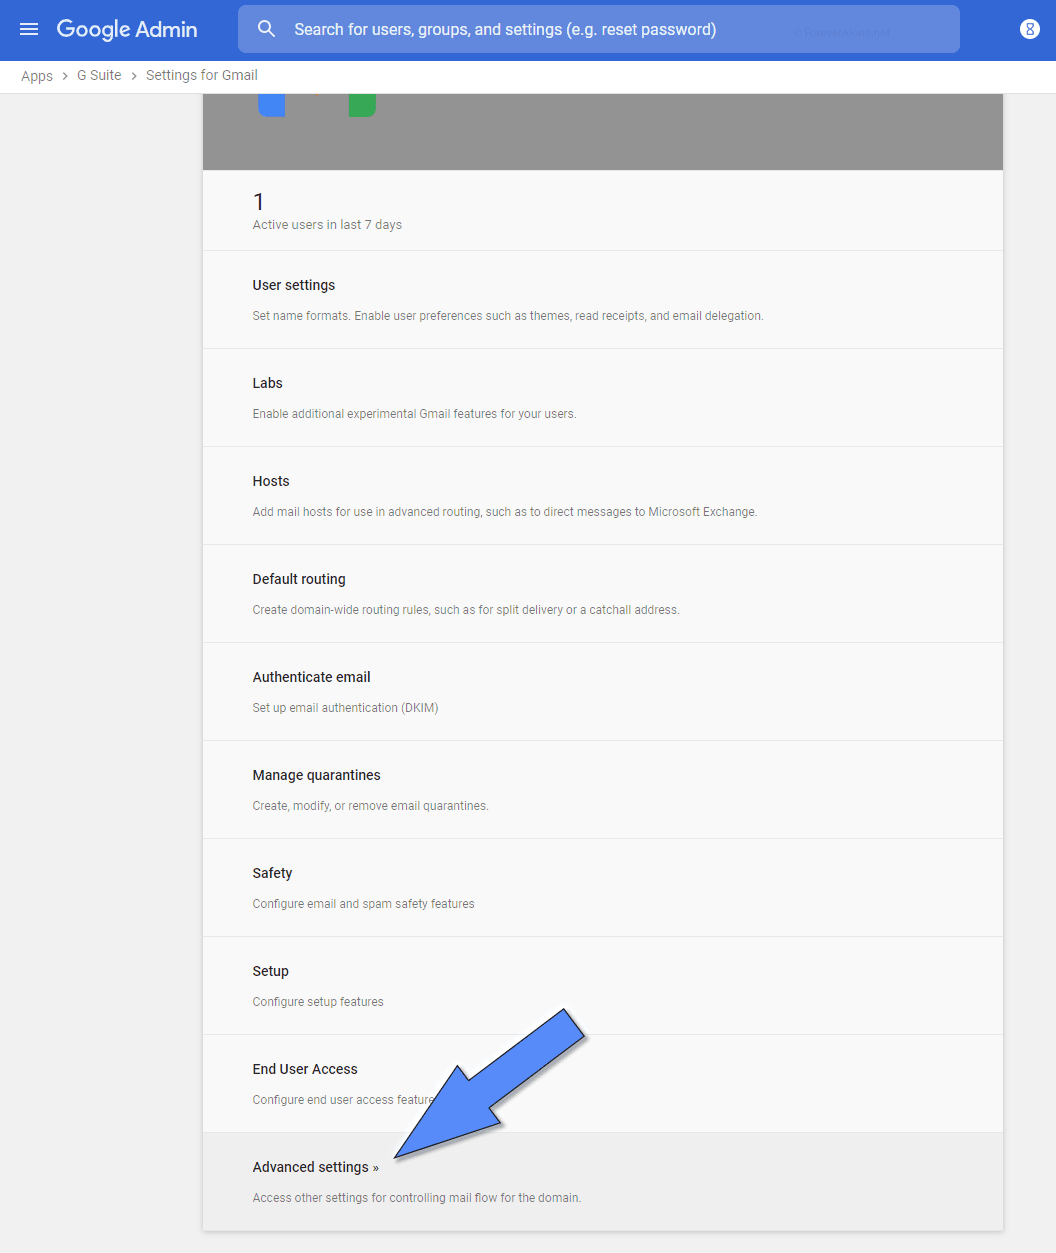
- Scroll down to the bottom until you find Advanced settings and click it
- Under General Settings, search for Relay
- Click Configure
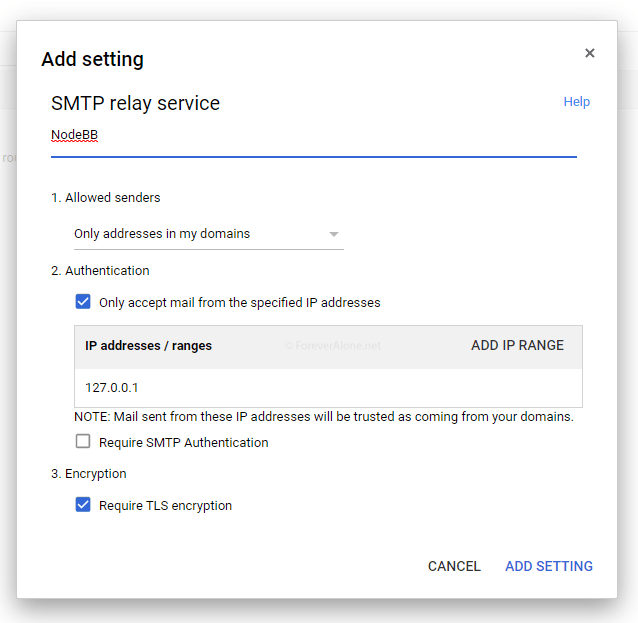
Add a name for your SMTP relay. Now, change the settings to:
- Allowed senders – Only addresses in my domains
- Authentication – Only accept mail from the specified IP addresses. Add in your server’s IP address.
- Encryption – ☑ Require TLS encryption
Remember to click Add Setting and Save.
Step 2) Configure nodeBB email for SMTP relay
Open up your nodeBB Admin dashboard and navigate to the email settings by clicking on Settings -> Email.
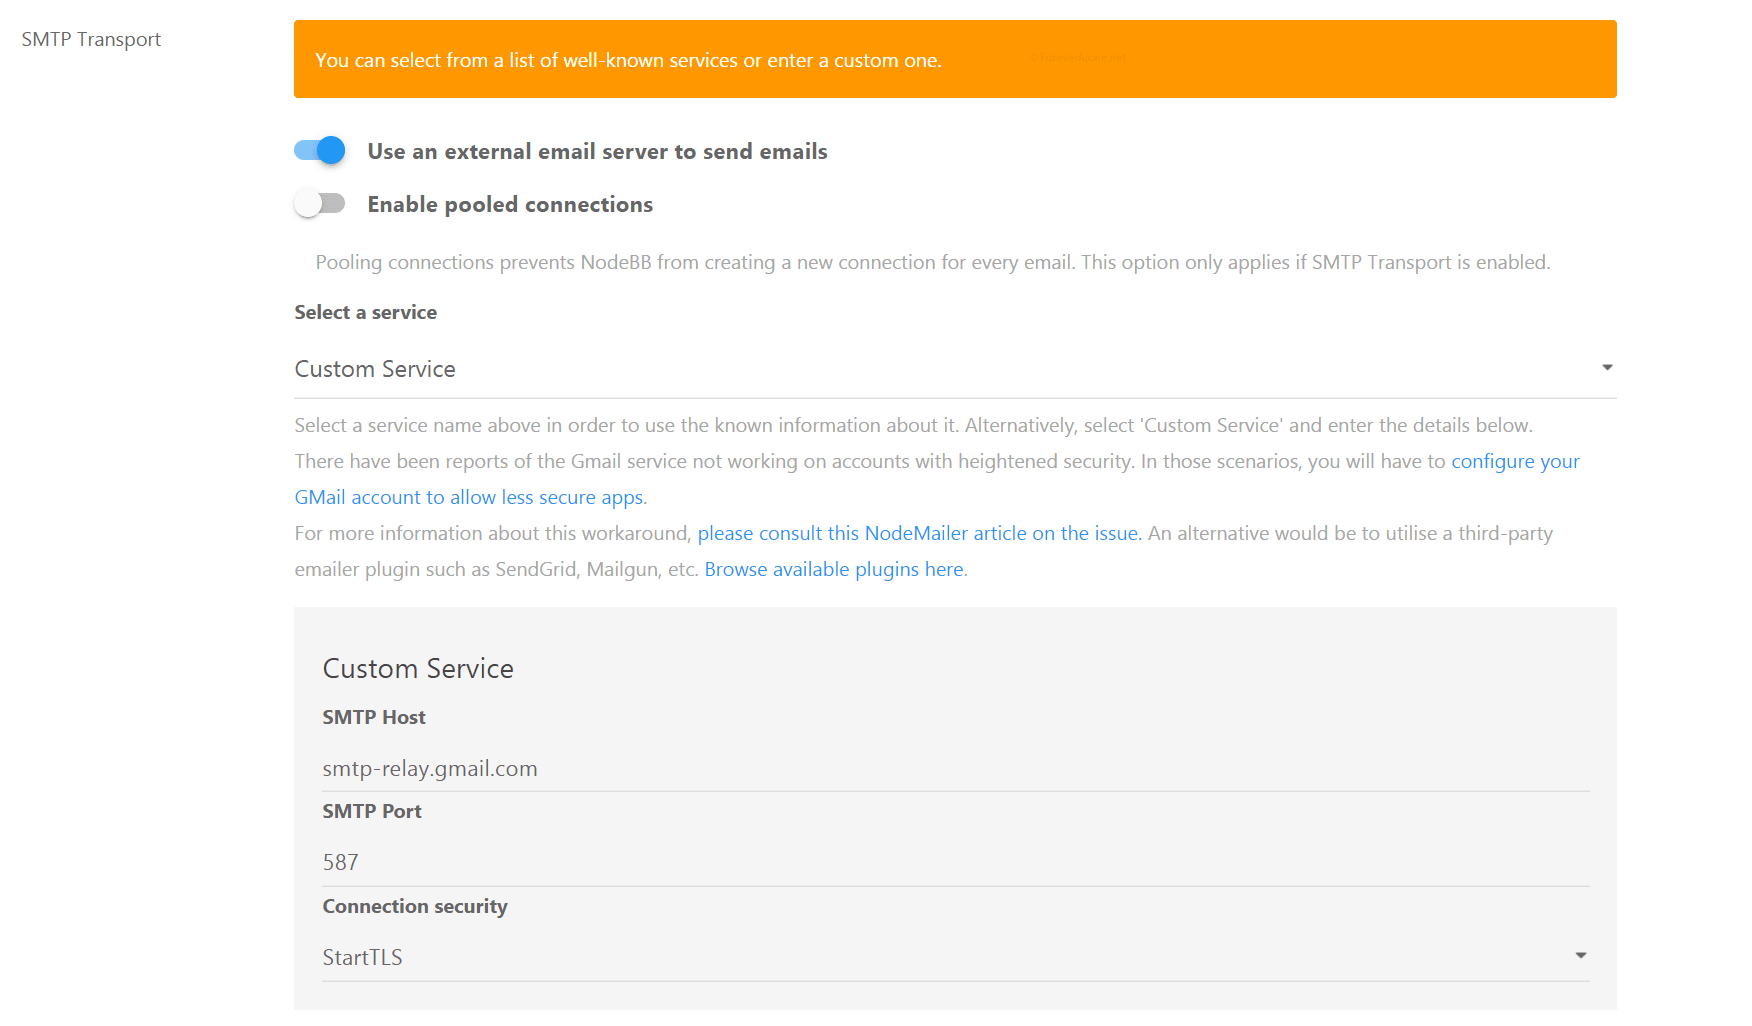
Scroll down until you get to the SMTP Transport section. Enable Use an external email server to send emails.
Under Select a service, choose Custom Service. Then change the settings to:
Make sure you save your settings.
Everything should be setup now.
Test your email by clicking on the Send Test Email button at the bottom.
If you need help leave a comment down below.
Troubleshooting Error 421
If you try sending a test email and you get a 421 error then you need to edit the emailing code to include your site’s domain name.
ERROR
Server terminates connection. response=421 4.7.0 Try again later, closing connection. (EHLO) s22sm961094vkm.4 - gsmtp: 421 4.7.0 Try again later, closing connection. (EHLO) s22sm961094vkm.4 - gsmtp
The reason this happens is because Google’s SMTP relay host has been targeted by a DDoS attack.
To mitigate this, Google now requires domains identify themselves before connecting to the relay server. Otherwise, the connection will be denied.
Solution
- Open the file src/emailer.js
- Scroll down to line 120 where it says
- Add this line under pool and add your domain namename: ‘your-domain-name.extension’,
	const smtpOptions = {
		pool: config['email:smtpTransport:pool'],
	};
For example, here’s how it would look like for this site:
	const smtpOptions = {
		pool: config['email:smtpTransport:pool'],
		name: 'ForeverAlone.net',
	};
Save the file then Rebuild & Restart nodeBB.
If rebuilding doesn’t work then try running the command
./nodebb upgradeThen
./nodebb buildFinally
./nodebb start